Paper planes: simple embroidered canvas art
This easy embroidered canvas art is a great way to personalise a space. All you need is a meaningful image and a little bit of time.
This simple embroidered canvas art is a super easy way to commemorate a special event and personalise a space.

Disclosure: This post contains affiliate links. If you use these links to make a purchase, I may earn a small commission at no extra cost to you.
The inspiration for this simple embroidered canvas art
We had a destination wedding. Sort of.
We were living in Germany at the time and decided to get married on one of my favourite childhood beaches in Australia. This meant that half of our guests and most of our bridal party had to travel from Europe, the US or interstate.
Partly because of ‘destination’ style wedding and partly because of the song that had become the theme of our relationship and was the first dance song at our wedding (Metallica’s “Nothing Else Matters”), I, well we decided to have a travel theme. I mean, doesn’t it work perfectly with the line “So close, no matter how far”?
In order to save money, I decided to design all the invitations, etc. myself. In keeping with the theme, we had telegram save the date cards, plane ticket invitations, passport programs, and a bag tag seating chart. The tables were ‘destinations’ and we used a lot of vintage suitcases.
Instead of confetti, we had paper planes.

When I was styling the new cabinet in the hallway, I realised that we needed a small piece of art for one shelf. Preferably, it had to be mostly white, but I wanted it to have meaning for us. In one serendipitous moment, I came us with the perfect solution. It was so easy! And it took me less than half an hour.
So easy, so personal, so easy to personalise
Not only was it quick and easy (my favourite type of DIY with a 3 y.o.), but it was a speditious way to personalise the space. All you need is a simple image that has meaning for you.
For example, if your school or favourite team are known as the hawks or stallions, you could use Picasso’s hawk or horse drawings as your image. Of course, you should use your team or school colours for your images too.
If there is a state, city or country that is special to you, use part of that state’s, city’s or country’s emblem or border (a little like these) for your embroidered canvas art. For example, to reference where you are from or met your significant other.
Or make a car or a helicopter for a little car lover. Or dinosaur or dinosaur footprint for a little dinosaur aficionado. Even mouse ears for the Disney lover.
The options are endless!
I have an idea, where do I get an image?
I was actually going to provide some templates in our Little helpers, but there are so many options, I did not think I could make enough for everyone’s taste.
Subscribe to our emails (below) and access all our Little helpers! They’ll help make your life lighter and more fun!
Still, finding an image is simple. Go to google. Type in “clipart outline” and the name of the image you are searching for. “Colouring page” and the name of what you are searching for might also yield a good image.
Alternatively, if you are willing to pay around $1 for your image, go to etsy.com and type in “clipart outline” and the image you want. I found some great images – windmills if Amsterdam is special, a heartbeat with heart for love or if you are making it for someone with heart problems, a hairdryer for a hairdresser, a dump truck, a crab, a stylized cat, a guitar… and that was just in the first few images.
Embroidered canvas art

Simple embroidered canvas art
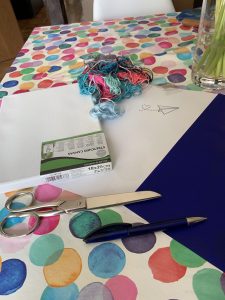
Materials
- 1 small canvas
- 1 sheet carbon copy paper (not essential)
- embroidery thread in your chosen colours
- 1 image (hand drawn or a printed image)
Instructions
- Decide on your image size and its placement on the canvas and then trace over it, placing the carbon copy paper between the canvas and the image. Make sure the carbon copy paper is the right way round or it will not work.
- If you don't have an image or carbon copy paper, you can hand-draw the image you want.
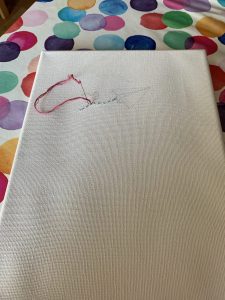
- Thread the embroidery thread through the needle. Stitch through the canvas, following the lines you transferred onto or drew on the canvas. Keep stitching until your embroidered canvas art is done.

Notes

Make your own embroidered canvas art!
Simple, quick and oh so special: make some embroidered canvas art for yourself or a gift!
The biggest question is: what shape will you make?
Just a side note
I ended up putting my nail polish in a jar in the cupboard because there wasn’t going to be space in our new bathroom. The simplicity, I think, makes it nice enough to be on display. It also reminds me that the last time my Mum and I had a pedicure together was our wedding. The wooden hand completing the trio is not only a nod to the nail polish, but the ‘horns’ pose is a nod to Metallica and our first dance song. The embroidered canvas art with our signature paper plane completes the trio.